Makeup Review: Hera Rougeholic Lipstick

Header

Overview

Hera is a brand under Amore Pacific, and is divided into two lines “Seoulista” and “Mizium”. Seoulista is their cosmetics line, and she is a Korean woman who, like the Parisienne and New Yorker before her, stands as an icon of the future and new era. Hera is a long-time leader in K-Beauty, and has attracted women around the world. “Mizium” is their skincare line. They use cell-bio technology, which focuses on examining the skin cells.

I first learned about Hera because of their famous UV Mist Cushion, and have been hooked ever since. Their brand model is the beautiful Jun Ji Hyun, and she has advertised their products in the popular drama Legend of the Blue Sea.

Where?

1.) Department Stores (Lotte, Shinsegae, Hyundai)
If you live in Korea or come to visit, you can easily find Hera products in any department store. They often have sets and various promotions.

2.) Duty Free
When leaving Incheon Airport, you can get the best deals on any Korean cosmetics in the duty free shop.

3.) Online (Amazon, or other Korean Cosmetic websites)
If you live abroad, you can find HERA products at competitive prices: buy here

Price?

Hera is considered relatively high end in Korea. They’re primarily known for their high quality skincare, which is marketed towards women in their upper 40s to 50s. Many young women in their 20s buy Hera cosmetics, as they often dupe higher end luxury brands. Their lip products range in the 30,000 won range, and their famous UV Mist Cushion costs around 40,000 won. Skincare ranges from 65~90,000 won.

Packaging?

I usually LOVE the way Hera packages all of their products. The Rougeholic Lipstick comes in sleek fingerprint-proof black packaging. The cap clicks open and shut, and the lipstick bullet twists up. However, the Hera Sensual Lip Serum is made of very thin, cheap, plastic.

SAMSUNG CAMERA PICTURES

LEFT: Rougeholic Lipstick / RIGHT: Seunsual Lip Serum

Hera Rougeholic Lipstick
(No. 147 Supreme Pink)
Price: 29,750 won ($29 USD)

“A fascinating full-color lipstick that offers sensual colors and a melt-in texture for more beautiful, vibrant looking lips.”

This line of lipsticks come in 31 different shades. The website claims that it has a high elastic texture, comparable to CC cream on the lips. This particular color is worn by Jun Ji Hyun in several episodes of the drama Legend of the Blue Sea.

Coral.png

Like the website claims, the lipstick is indeed glossy. It applies very smoothly and it feels like a lip balm. The pigmentation is also amazing! One swipe, and you’re pretty much good to go. They also recommend applying the Lip Serum first, and then creating a gradient effect with the lipstick.

Supreme Pink

After one swipe

Since the lipstick is so glossy and moisturizing, it’s not very long lasting. It fades quickly and comes off very easily with food, it’s definitely NOT kiss-proof.

It’s a beautiful coral pink (although it appears hot pink in person) and this bright color is perfect for the summer. Honestly, Jun Ji Hyun started the bright lipstick trend in Korea, and it’s not going away any time soon.

Two applications

1474283146613

Hera Sensual Lip Serum
(No. 1 Love Blossom)
Price: 29,750 won ($29 USD)

This product reminds me ALOT of the Dior Lip Glow.

“A moisturizing essential glossy color lip balm that glides on the lips to keep the lips moist all day long.”

Unlike Dior, Hera doesn’t claim to have a “customizable” pink lip. As a lip balm, it works perfectly well, but it’s a very expensive one. I was hoping for a bit more pigmentation, especially since it appears so dark in the tube.

SAMSUNG CAMERA PICTURES

One swipe

This product is more moisturizing than the Dior Lip Glow, but it feels like an expensive chapstick. As it’s the same price as the lipstick, I definitely recommend picking that up over this. Maybe the other colors are a bit more pigmented, but this fell flat for me.

Let me know in the comments below if you want me to review anymore Hera products! Did any of you watch Legend of the Blue Sea? Until next time~


Shopping Online: Emart Delivery

Hi guys! So today I’m going to show you how to place an order on Emart. You can choose the time window and groceries will be delivered to your door. This process works the same for other places like Homeplus and Lotte Mart. Keep in mind:

  • You usually have to spend at LEAST 30,000 won in order to have groceries delivered.
  • You can receive discounts on some debit cards/credit cards.
  • You should try to be at home for your delivery, unless you write in the “notes” section that you want the delivery man to leave the groceries outside of your door.

Things You Need

  • Your debit card (already set up)
  • You can only use Internet Explorer (otherwise use the app if the website has one)
  • Turn off Active X filtering
  • Allow/use pop up windows.
  • Any popup windows asking to install, you should install. Most Korean websites require security programs to be installed in order to check out using your card
  • An Emart account (here’s my sister’s guide on how to  Make an Account

Notes

  • Using a debit card is convenient: You do not need your code card, you don’t need your bank account number (or the seller’s), it’s almost like using a debit card in the US.

Step 1

Choose your groceries

Add to cart

Unfortunately you MUST type your groceries in Korean. A dictionary helps a lot. You must only select the item that has a blue sticker next to it or says “emart mall” because these are available for delivery. The rest are only delivered via the mail (meaning 1-2 days waiting time). Here are some basic groceries I always buy written in Korean:

  • Milk (우유)
  • Eggs (계란)
  • Onions (양파)
  • Garlic (마늘)
  • Chicken (닭고기)
  • Rice ()
  • Pasta (파스타)
  • Fruit (과일)

Step 2

Find your address.

Address

The red box reads “change your delivery address” your account probably does not have an address set up yet, or you had to do that when registering for your username. The process should be the same as my previous guide, Add your Address

Korean sites can be finicky with addresses, try clicking on the different tabs and typing in different parts of your address. It will often ask for your building name “건물명” or street name “도로명“. Sometimes they have convenient drop downs, so you can choose your city “도시” your district “” and your neighborhood ““.

**Remember to ALWAYS add your room number. (Room number호)**

Step 3

Check your total and Checkout.

Checkout

Make sure your total is over 30,000 won or there is a fee/you won’t be able to order. The bottom left reads 1. Order Total 2. Discount 3. Delivery Fee 4. Other fees 5. Total Cost.

For my order, they are charging 3,000 won to deliver the eggs. When you finish, click the red button to continue.

Step 4

Fill out/Confirm your information.

Info

Most of your information should be filled out already. The top section “고객정보” means customer information. I share this account with my older sister, so her information is here.

1. Your name 2. Email Address 3. Phone Number 4. Refund Method (a) The payment method you used for this order (b) Wire transfer.

배송정보” means, “delivery information“. Fill out where you want the groceries delivered. You can have multiple addresses saved.

1. Your name 2. Phone Number (First one is a landline) 3. Cellphone Number 4. Use a security number (click the second bubble for “no”) 4. Your Address

Step 5

Set up a Delivery Time.

Options

A) You can choose a 3 hour window for your groceries to be delivered. You can place an order up to 3 days in advance. Usually, I place my order the day before I want the groceries delivered. If you look at today (Tues 6.20) the times are grayed out because they’re unavailable. You may have to pay a fee for day of delivery. Click the bubble of the time you want.

B) Sign up for Delivery Notifications: You can have the driver send you text messages. He will give you a smaller time frame and notify you when your order is out for delivery. The first line reads “delivery message” if you want to have him drop off the groceries outside of your door, you can tell him that, and also tell him the building pass code to let himself in. The second line reads “gift message” if you’re delivering to another person.

C) If your item is sold out: If you check the first bubble, they will replace the items with a similar brand. If you check the second bubble, you won’t get the item.

**Unlike Homeplus, Emart will not notify you via message if you’re not getting an item. So if you order bread, and they’re sold out, you won’t receive it if you check the second bubble. The driver will hand you your invoice, and you’ll see the information on there. You will receive a refund based on what you checked off earlier.**

Step 6

Coupons/Discounts

Emart Card (1)

1) The first black box reads “recommended coupons” and the second one reads “delivery coupons“. There are often events to receive coupons, or if there’s a problem with your delivery you can receive them. In store, I’ve received a voucher for spending enough money. Just click on them and see if you have anything valid for your order.

Step 7

Payment Method.

Payment (2)

A) (From left to Right) Credit Card, Bank Transfer, Cellphone Payment, Samsung Pay, Kakao Pay, Foreign Card. I left out the top options because you probably won’t be using these methods. They added cellphone pay recently! I typically use my Shinhan Credit Card because I receive a 5% discount.

B) Choose your Bank Card (KB, Shinhan, Citibank, Hana Bank, etc.)

C) Pay in full or installments: Unless you have a credit card, it should read “일시불”

D) Use your Card Points (your debit card may offer reward points) check yes or no.

**I forgot to include this, but if you scroll down, check if your Emart Rewards Card is there. If you created one in person, it should be linked to your cellphone number. This card also works at several other stores, including Shinsegae Department Store.**

Step 8

Accept the terms and conditions.

Aceept

Click “모두 동의합니다” to accept ALL of the terms and conditions. Then continue to the payment window.

Step 9

Pay and Finish!

PAY (FINISH)


This time I included the KB Bank Payment Window. Click “결제하기” to check out. Use my guide for your Debit Card

I didn’t show you the final confirmation screen, since I didn’t actually check out the order. You will be receiving text notifications up until your order arrives. Feel free to leave any questions in the comments below!

Ordering Delivery: Baedal Minjeok (배달의민족)

Hi guys! So you’ve probably already seen a guide on the delivery app “Yogiyo” but today I’m going to talk to you about how to set up an account and order on Baedal Minjeok. I prefer this app, because there are more restaurants available in my area, and it’s better when trying to order food outside (by the Han River, in a park).

This guide is using a Shinhan Debit Card or Cell Phone Payment. That being said, the process should be almost the same for any other bank. Let’s get started!

Things You Need

  • Baedal Minjeok App (You might have to change your store to the Korean one for Apple users)
  • Your debit card (already set up)
  • Your cellphone (you need your ARC number for cellphone payment).
  • Any popup windows asking to install, you should install. Most Korean payment programs require security programs to be installed in order to check out using your card.

Notes

  • Using a debit card is convenient: You do not need your code card, or your bank account number. It’s almost like using a debit card in the US.
  • Using your cellphone is even MORE convenient, but make sure you keep track of how much you charge on it per month.

Step 1

Accepting the terms to create an account


The first window is asking you to accept the GPS services to find your location. The second window is asking if you want text message notifications from the app. I clicked yes because I want a time window for my order and any coupons. So click 동의 to continue.

Step 2

Register using Facebook.

Facebookdo


Click on the blue button to register with Facebook.

Step 3

Accept the terms.


Accept the terms again if the window pops up. Then you have to log into your account on the Facebook App. Click continue.

Step 4

Verify your phone number.


Type in your cell phone number in the blanks. You will get a text message, insert that into the box below and click 인증 to confirm.

Step 5

Navigating the App.


The first window is your profile page. From left to right reads (points, coupons, orders, reviews). In the second window is the main page that you’ll use to find the food you want to eat. From left to right (recommended places, bakery, chicken, chinese, pizza, korean food) if you scroll down you’ll find recommended restaurants in your area. Just click through and find something you want to eat. The app should automatically detect your location using GPS.

Step 6

Time to order!


On the left is the menu and restaurant information, there are usually helpful photos. You can also swipe to the left to find reviews. Most places have a minimum amount you have to spend in order to deliver (this restaurant is 10,000 won minimum). When you’ve added your order to the cart, it’s time to order! 주문하기

Step 7

Find your Address.


Before we continue, you’re going to have to enter your specific address. First click 변경 to change the general address your GPS located. Type in the name of your apartment, and click on the address. Mine is 리오파크. In the third window, type your room number (Ex: 200호). Then click 완료.  When you’re done you’ll be back at the first window, click 바로결제 to check out or if you want to pay in person click 만나서 결제.

Step 8

Payment Method.

Payment Method

So you have two options to pay for your order. 1. Debit Card 2. Cellphone Payment. Check the appropriate bubble and continue. I will briefly show you the Debit Card Method first.

Step 9

Debit Card Payment.


  1. Click on 전체동의 and beneath that you have to select your bank card. Mine is 신한 so I clicked on that option.
  2. Make sure the drop down reads 일시불 which means lump sum payment. For debit cards this is the only option  you have. Under that you can type in your email if you want to receive an email verifying your payment.
  3. Click on the second 결제하기 if you want to use the regular payment method, unless you already set up the Fan App.
  4. See my Debit Card Guide

Step 9

Cellphone Payment.


  1. Click on 전체 동의 and 확인 to continue.
  2. Click on your carrier, mine is KT.
  3. Type in your cellphone number.
  4. Type in the ARC number connected to the phone. Then click the pink button.
  5. Like before, you will receive a text message with a verification code. Type it in and continue.

Step 10

COMPLETE.

FINISHED

My favorite words. You will receive a text message letting you know how long it will take to process your order (usually 40-50 minutes). You can check on the app for the status.

Pretty easy, right? Happy eating!!

Japan Trip (Osaka, Kyoto, Nara, Kobe)

Hi guys~ this is my first post in a long while. I’m planning to film a short video or do a review on some of the things I picked up in Japan, I managed to stay within my budget. So this is the first time I’ve EVER done a whole trip on my own (excluding my move to Korea of course). I’m going to give you a detailed itinerary while I sit here drinking the new Choux Cream Strawberry Frappuccino from Starbucks (it’s delicious by the way).

Day 1

I booked my flight from Incheon for Saturday, June 3rd at 2:15 PM. This included a 4 hour layover in Qingdao, China and landed in Kansai Airport at 9:45 PM. Honestly, I only booked it because it was the cheapest flight I could find (with my school it’s hard to book trips in advance, so as a last minute alternative I made it work). If you’re familiar with Asia, it’s stupid to fly to China, only to backtrack and fly back to Japan. A direct flight is only 1 hour and 40 minutes, so I definitely recommend doing that instead if you book in advance or have the extra money when tickets sky rocket in the summer.

The reason why this idea was EXTRA stupid was because the rules at the Chinese Airport. When I landed, I had to proceed through immigration (Qingdao does not have a transfer desk). So I went through customs (there was a weird X-Ray machine), had to pick up my bag at baggage claim, and then I had to go back up to Departures, wait for check-in again, and then proceed through security and immigration AGAIN. The airport wasn’t air-conditioned and I couldn’t access the wi-fi.

After all this trouble, at least I had a meal on my second flight and landed in a timely manner in Kansai Airport. The man at the information desk was amazing. I knew that since I was landing late, the phone counters would be closed. He directed me to the vending machines to rent my SIM Card. I stupidly selected a 7 day rental (200 mb per day) so I didn’t wind up returning it…oops. When I returned to the desk for more help, he directed me to the Nankai Airport Line, and told me to make the transfer at Tengachaya Station to my hotel. I stayed at the Osaka Ebisu Hotel which was VERY conveniently located near the airport, I got on the second to last train. Fortunately my friend gave me her ICOCA Card so I just had to add some cash (I added 2,000 yen) and then I was off.

I loved that the hotel has 24 hour check-in, which was the main reason I booked it (plus it was very affordable). I also chose a standard double room, since there weren’t any single rooms available. The only downside was their public shower room. One evening I found myself waiting outside the shower for 30 minutes since there was only one room. However, the hotel was clean, and the staff was relatively helpful. I went to bed late, around 1:30 AM? And I set my alarm for an early start the next day.

Day 2

I was out of the hotel by 7:30 AM and I walked to the next closest subway station, JR Shin Imamiya. The Japanese subway system is confusing because it’s owned by different companies. So I went to the JR Line to try and go directly to Sumiyoshi Taisha Shrine, but I got lost and went to Tennoji by accident. So I sucked it up and decided to instead walk to Shitennoji Temple. Unfortunately the inner area is often closed during the beginning of the month, but I made the most of it, took some pictures, and checked out a little pop-up market, where they were selling unique souvenirs. I ate my muffin (courtesy of Family Mart convenience store) and had some coffee from one of the MANY vending machines found in Osaka.
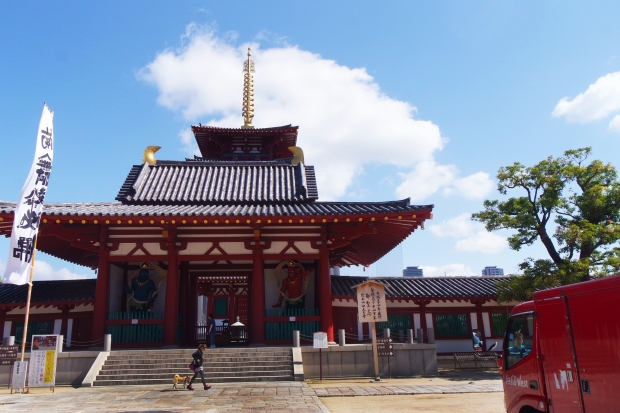
SAM_2720.JPG

Shitennoji Temple

After, I hopped onto the purple line (Shitennoji-mae Yuhigaoka > Tanimachi 4 chome). Osaka Castle Park is huge, and you could spend a day here. The scenery was beautiful, and I thoroughly enjoyed the walk to the Castle (which was quite far). I was happy that I arrived so early, as I avoided the tourists and got into the museum fairly quickly, since I took the stairs.

SAMSUNG CAMERA PICTURES

Osaka Castle

I bought my ticket at the vending machine for about 600 yen (Approx. $6 USD). There were quite a few floors, so the walk up was pretty exhausting. The museum was interesting, but it would have been nice to see a part of what the castle might have looked like before. The view from the top was stunning however.

At this point, I worked up an appetite, so I headed out to Tenjinbashisuji 6 chome Station. I had researched several sushi places, and heard quite a few reviews about Harukoma Sushi. I got there 10 minutes before opening time (11 AM) and there was already a line. They awkwardly broke up the line behind another shop, so it was a bit confusing. The sign had also changed significantly from the blog posts I had seen, and I can’t read Japanese, so I had to look back and forth carefully at the characters. The new sign has a brush painting of a horse on it, and I confirmed with the woman at the front of the line that this was indeed Harukoma.

They handed me an English Menu while I waited in line, and I wrote down my order on a notepad. I definitely ordered too much food, (Tuna Belly, Tamago Sushi, Salmon, Snapper, Uni, and a hand roll). Each item came with 2~3 pieces of sushi, so I was stuffed by the end of it. It was incredibly affordable, I think I paid 1,200 yen total (around $12 USD). More importantly…it was DELICIOUS.
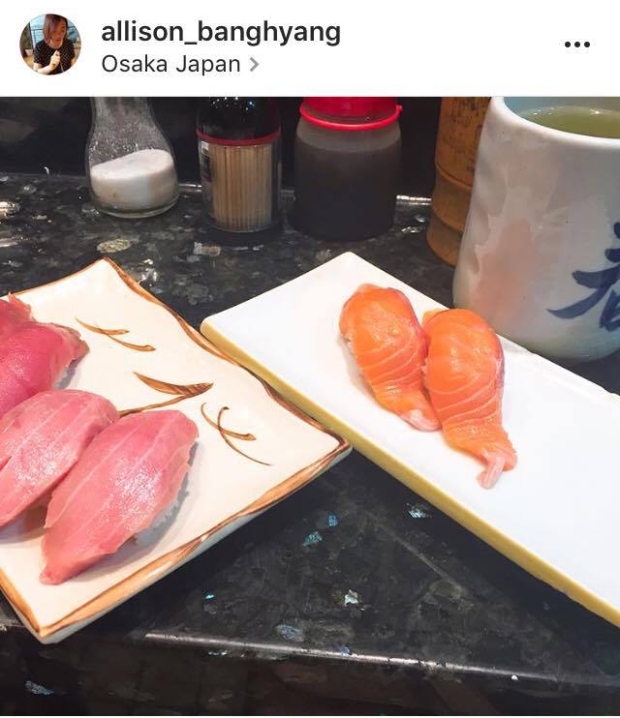
18986366_1546581115352899_302664946_o

Harukoma Sushi

I hopped back onto the same purple line and got off at Higashi-Umeda Station. I stopped at the tourism desk for a map and was told I could easily walk to the Umeda Sky Building from there. Tons of people were outside bathing in the little pools out front and the weather was beautiful. I stopped at the Pokemon Center in the Daimaru Building on the 13th Floor and spent way too much. I wasn’t allowed to take photos, but let’s just say it was smaller than I expected. I picked up some cute stationary items, small plushies (Espeon, Alola Vulpix, and Sylveon) Pikachu Ramen, and some Pokemon Makeup. I received free postcards for spending so much. Unfortunately they don’t offer tax-free purchases anymore. Japanese are so meticulous about packaging things. The cashier sealed smaller items in cute little yellow bags and then put them all into one huge bag, and added about 30 gift bags, and then taped it shut. My arm suffered from the weight of it all. But it was worth it.

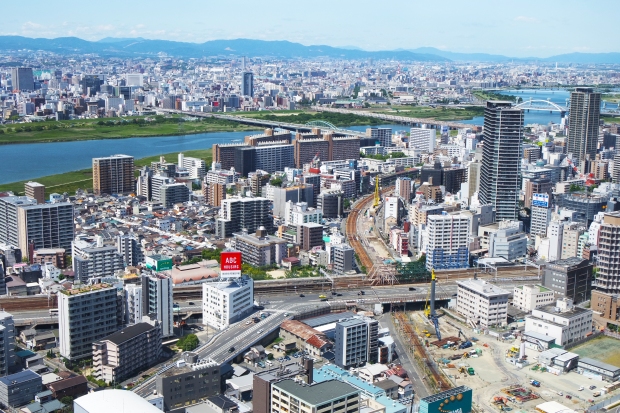
I’ve been to a lot of skyscrapers with beautiful views of their respective cities (Sky 100, Taipei 101, Namsan Tower, Tokyo Tower etc.) but nothing impressed me the way Umeda Sky Building did. The architecture was stunning, and the ride up the escalator was part of the whole experience. Entrance fee was 1,000 yen (Approx. $10 USD) so it wasn’t a bad price to pay for a beautiful view. Usually I try to see the night view of the city, but I didn’t have much time that day, so I went when there weren’t any people around, during the mid-afternoon. There were tons of seating and people just lounged about enjoying the view. I saw the usual heart locks, and then proceeded up to the observation deck. It was extremely windy, but the view was amazing.

SAMSUNG CAMERA PICTURES

View from Umeda Sky Building

It was still early, so I decided to try and go to the elusive Sumiyoshi Taisha Shrine AGAIN. I took the red line to Dobutsuen-mae (which I had to transfer at already anyway) and instead transferred to the JR Nankai Line. I then realized my first mistake I had made that morning, Shin Imamiya Station is in fact divided into separate stations. I hadn’t made it to the Airport Line Station that morning, but a different station. This time I got on the train in the right direction, but it was the Express Train. So I shot past my stop. I got off and asked for directions, and the conductor spoke enough English to lead me in the right direction. And I FINALLY made it.

SAM_2737.JPG

Sumiyoshi-Taisha

It was SO much bigger than expected. Not many people, and it was free to enter. Honestly, it was the most peaceful experience in the middle of a city. It was so interesting to see the shrine maidens with their beautiful headpieces and traditional dress, and I thoroughly enjoyed simply walking around the grounds.

I headed back to the hotel and rested an hour, because I wanted to drop off the heavy Pokemon Center Bag and I wanted to see the night views of Dotonbori. I arrived early still, around 6 PM at Namba Station and headed over to the line for Kinryu Ramen. It was vending machine style with only two menu options. I paid 600 yen (Approx. $6 USD). Honestly, I didn’t really like adding kimchi to the ramen, it felt a bit like Koreanized Ramen. I also didn’t have my favorite egg, and the pork was tough…like shoe leather. I’ve had better ramen in Korea and New York so I was surprised by its popularity.

I got some takoyaki at Creo-ru, and it was pretty good! I walked along the street burning my mouth on the piping hot filling, and after I finished it, I couldn’t find a place to throw out the container. I think I was supposed to return to the stand, but couldn’t be bothered, and found a trash bin behind some unsuspecting smokers. I then headed over to the bridge to find the famous Glico Man.

19047025_1545673832110294_416776001_o

Honestly, it was SO difficult to get this shot, there was an enormous crowd. With a friend, I might have been able to get a picture with him, but by myself…it was hopeless. I wanted to check out the cruise on the canal, but it was rather expensive and read that it was a 20 minute trip. So I went to find more food instead. I went to Pablo Cheesecake…and found it was sold out. I sucked it up and realized I could get some in the Department Stores in Seoul.

Then it was time for shopping! This time I decided to check out the huge Don Quijote Store, with several shopping goals in mind. I picked up two different Kit Kat Flavors (Yokohama Cheesecake and Raspberry Cheesecake), Strawberry Mochi, Nameraka Honpo Kehousui Lotion, Rimmel Chocolat Sweet Eye Shadow Palette, and the famous LuluLun Sheet Masks. The pack of 36 was around 1,200 yen so it was a great deal.

I stopped in a Matsumoto Kiyoshi for the Majolica Majorca Blush my sister wanted in the color (PK301) since it was sold out everywhere else. I also got two packs of the famous Suisai Kanebo Beauty Clear Powder for about 3,200 yen, (Approx. $32 USD). There were several other cosmetics I wanted to buy…but I tried to stay within budget, since I knew I wanted to buy some souvenirs the next day.

Day 3

So Day 3 I booked a tour through viator.com. I chose the package including entrance fees, and meals. I left my hotel early (around 7:35 AM) and headed to Shin Imamiya Station again. This time I took the JR Yamotoji Line to meet the tour company at JR Namba Station. We had two tour guides, an English speaking girl named Aska, and a Chinese speaking guy named Tai. Both were super friendly, and I’m glad they wore bright yellow, so they were easy to find throughout the day. Honestly, I couldn’t have done everything we did on my own, even though I wish I had a bit more time at each site.


Arashiyama’s main street has a ton of traditional souvenirs and street food. I decided to get the buffet lunch, so it meant one less hour. I rushed to buy a few items (traditional Japanese chopsticks and a holder, a handkerchief, post cards, flower shaped jelly, and yatsuhashi).

Next we went to Kinkaju-ji the Golden Pavilion. It was a short walk around the grounds, and the views were beautiful.

SAMSUNG CAMERA PICTURES

I loved the ticket, a small amulet that promises good fortune.

19022546_1546580775352933_1420442682_o

Next we headed to Nara Park. The deer were friendly and cute, they bowed to people offering them food. Todaiji Temple was an enormous wooden temple, and the Buddha inside was huge. In the back there was a wooden column with a hole carved into it (the size of Buddha’s nostril) and people squeezed through to get rid of their bad luck.


After Nara we dropped off a few of the other people, before heading to our last destination…Kobe. We went to MOSAIC Shopping Mall. I wish I had arrived a bit earlier so I could ride the ferris wheel, but instead…I had unlimited kobe beef shabu shabu. It was delicious, but eating it all alone was challenging. Afterwards, I checked out a Studio Ghibli Store, the Sega Arcade, and took some photos overlooking Kobe Port.

We arrived back in Osaka around 8:30 PM. The tour was definitely worth the price, getting to each city via train would have been difficult, expensive, and time-consuming. I would love to go back to Kyoto and do a proper trip (1~3 days).

Day 4

The trip back home was extremely stressful. China Eastern canceled my flight to Shanghai due to weather conditions and air traffic control. I got the notification via google flights late on the previous evening. I tried to contact the airline, but I knew I’d just have to get to the airport early in the morning. I took the rapit train to the airport and arrived at 6:30 AM.

China Eastern re-routed us to Shanghai Airlines for the same departure time, and it seemed as if it would go smoothly from there. But…they told me I’d have to pick up my luggage again in China and re-check it. However, when boarding the plane, a FA notified me that my bag would be checked all the way through to Incheon. Later at the transfer desk in China, the woman said they couldn’t locate my luggage and I’d have to wait until I got to the gate to request for more information.

At the gate, a nice gentleman was able to locate and confirm my luggage had been moved to the flight to Incheon. My experience with this airline hasn’t been the greatest…in the past they had engine issues and I was re-routed on a trip back to NYC. But-it’s the cheapest option, so I do what I can.

Overall, I would recommend making use of google flights and google maps when traveling in Japan. Google Maps was SO helpful during this trip, they did the work finding me the best routes via subway to my destinations.

Here is a copy of my itinerary! And a link to the viator tour. Thanks for reading!!

Osaka_Itinerary

Viator Day Trip