Hi guys! So today I’m going to show you how to place an order on Emart. You can choose the time window and groceries will be delivered to your door. This process works the same for other places like Homeplus and Lotte Mart. Keep in mind:
- You usually have to spend at LEAST 30,000 won in order to have groceries delivered.
- You can receive discounts on some debit cards/credit cards.
- You should try to be at home for your delivery, unless you write in the “notes” section that you want the delivery man to leave the groceries outside of your door.
Things You Need
- Your debit card (already set up)
- You can only use Internet Explorer (otherwise use the app if the website has one)
- Turn off Active X filtering
- Allow/use pop up windows.
- Any popup windows asking to install, you should install. Most Korean websites require security programs to be installed in order to check out using your card
- An Emart account (here’s my sister’s guide on how to Make an Account
Notes
- Using a debit card is convenient: You do not need your code card, you don’t need your bank account number (or the seller’s), it’s almost like using a debit card in the US.
Step 1
Choose your groceries

Unfortunately you MUST type your groceries in Korean. A dictionary helps a lot. You must only select the item that has a blue sticker next to it or says “emart mall” because these are available for delivery. The rest are only delivered via the mail (meaning 1-2 days waiting time). Here are some basic groceries I always buy written in Korean:
- Milk (우유)
- Eggs (계란)
- Onions (양파)
- Garlic (마늘)
- Chicken (닭고기)
- Rice (쌀)
- Pasta (파스타)
- Fruit (과일)
Step 2
Find your address.

The red box reads “change your delivery address” your account probably does not have an address set up yet, or you had to do that when registering for your username. The process should be the same as my previous guide, Add your Address
Korean sites can be finicky with addresses, try clicking on the different tabs and typing in different parts of your address. It will often ask for your building name “건물명” or street name “도로명“. Sometimes they have convenient drop downs, so you can choose your city “도시” your district “구” and your neighborhood “동“.
**Remember to ALWAYS add your room number. (Room number호)**
Step 3
Check your total and Checkout.
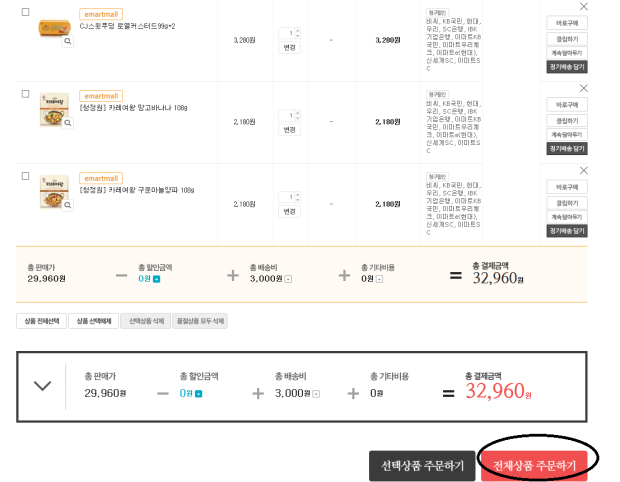
Make sure your total is over 30,000 won or there is a fee/you won’t be able to order. The bottom left reads 1. Order Total 2. Discount 3. Delivery Fee 4. Other fees 5. Total Cost.
For my order, they are charging 3,000 won to deliver the eggs. When you finish, click the red button to continue.
Step 4
Fill out/Confirm your information.

Most of your information should be filled out already. The top section “고객정보” means customer information. I share this account with my older sister, so her information is here.
1. Your name 2. Email Address 3. Phone Number 4. Refund Method (a) The payment method you used for this order (b) Wire transfer.
“배송정보” means, “delivery information“. Fill out where you want the groceries delivered. You can have multiple addresses saved.
1. Your name 2. Phone Number (First one is a landline) 3. Cellphone Number 4. Use a security number (click the second bubble for “no”) 4. Your Address
Step 5
Set up a Delivery Time.

A) You can choose a 3 hour window for your groceries to be delivered. You can place an order up to 3 days in advance. Usually, I place my order the day before I want the groceries delivered. If you look at today (Tues 6.20) the times are grayed out because they’re unavailable. You may have to pay a fee for day of delivery. Click the bubble of the time you want.
B) Sign up for Delivery Notifications: You can have the driver send you text messages. He will give you a smaller time frame and notify you when your order is out for delivery. The first line reads “delivery message” if you want to have him drop off the groceries outside of your door, you can tell him that, and also tell him the building pass code to let himself in. The second line reads “gift message” if you’re delivering to another person.
C) If your item is sold out: If you check the first bubble, they will replace the items with a similar brand. If you check the second bubble, you won’t get the item.
**Unlike Homeplus, Emart will not notify you via message if you’re not getting an item. So if you order bread, and they’re sold out, you won’t receive it if you check the second bubble. The driver will hand you your invoice, and you’ll see the information on there. You will receive a refund based on what you checked off earlier.**
Step 6
Coupons/Discounts

1) The first black box reads “recommended coupons” and the second one reads “delivery coupons“. There are often events to receive coupons, or if there’s a problem with your delivery you can receive them. In store, I’ve received a voucher for spending enough money. Just click on them and see if you have anything valid for your order.
Step 7
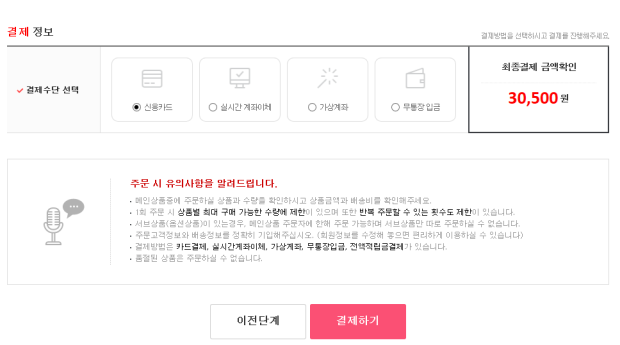
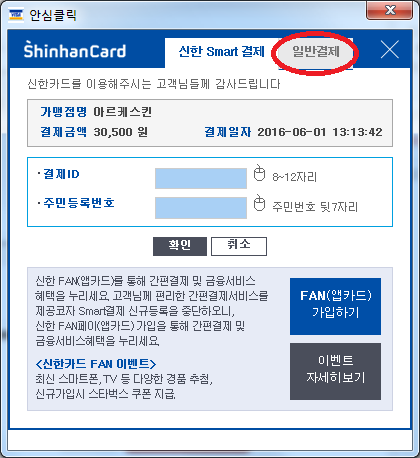
Payment Method.

A) (From left to Right) Credit Card, Bank Transfer, Cellphone Payment, Samsung Pay, Kakao Pay, Foreign Card. I left out the top options because you probably won’t be using these methods. They added cellphone pay recently! I typically use my Shinhan Credit Card because I receive a 5% discount.
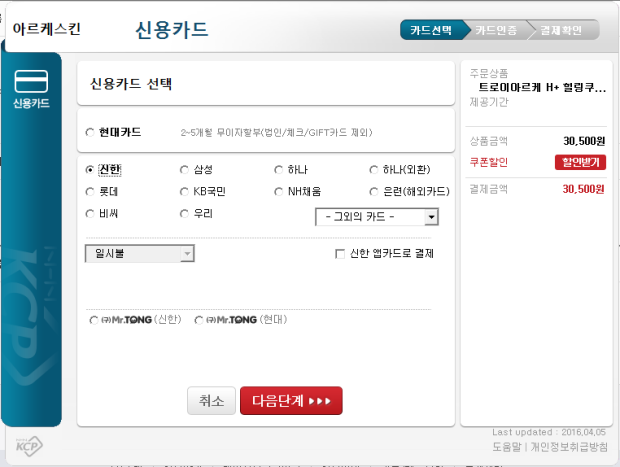
B) Choose your Bank Card (KB, Shinhan, Citibank, Hana Bank, etc.)
C) Pay in full or installments: Unless you have a credit card, it should read “일시불”
D) Use your Card Points (your debit card may offer reward points) check yes or no.
**I forgot to include this, but if you scroll down, check if your Emart Rewards Card is there. If you created one in person, it should be linked to your cellphone number. This card also works at several other stores, including Shinsegae Department Store.**
Step 8
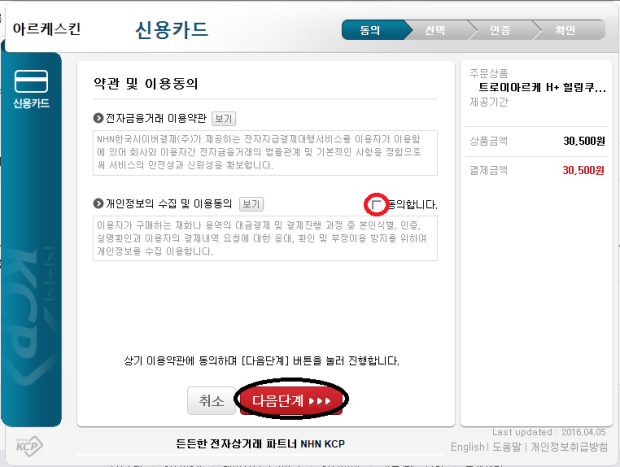
Accept the terms and conditions.
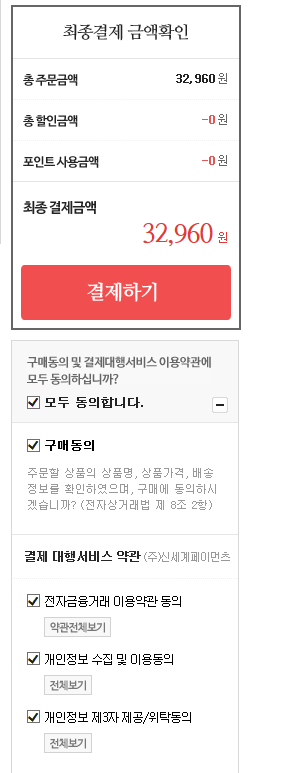
Click “모두 동의합니다” to accept ALL of the terms and conditions. Then continue to the payment window.
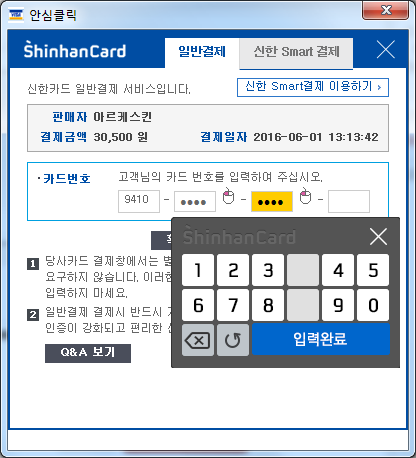
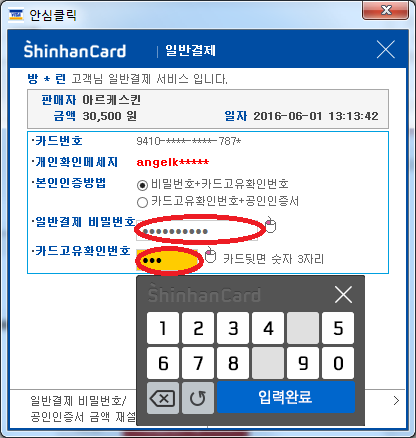
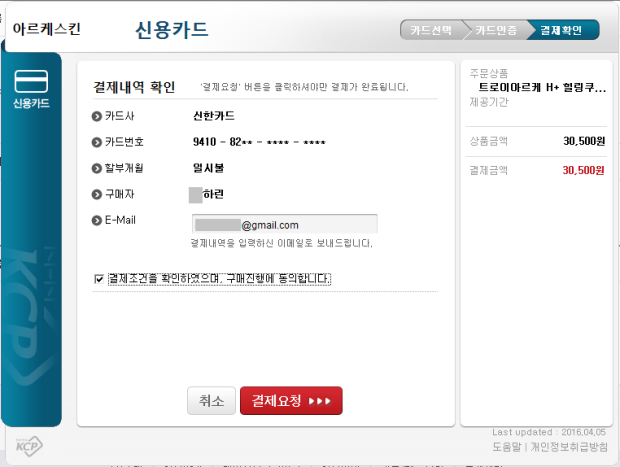
Step 9
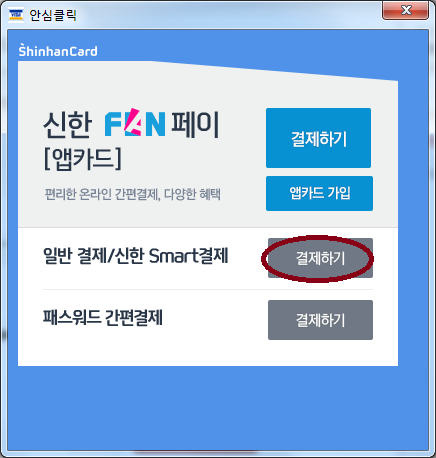
Pay and Finish!

This time I included the KB Bank Payment Window. Click “결제하기” to check out. Use my guide for your Debit Card
I didn’t show you the final confirmation screen, since I didn’t actually check out the order. You will be receiving text notifications up until your order arrives. Feel free to leave any questions in the comments below!